Follow the steps below to create and send an invoice for a confirmed trip in Tuvoli.
Step 1: Confirm the Trip
- Create a quote and follow the standard workflow to confirm the trip.
- A trip must be confirmed before an invoice can be generated, as invoicing is part of the Trip Management workflow.

Step 2: Access the Invoice Section
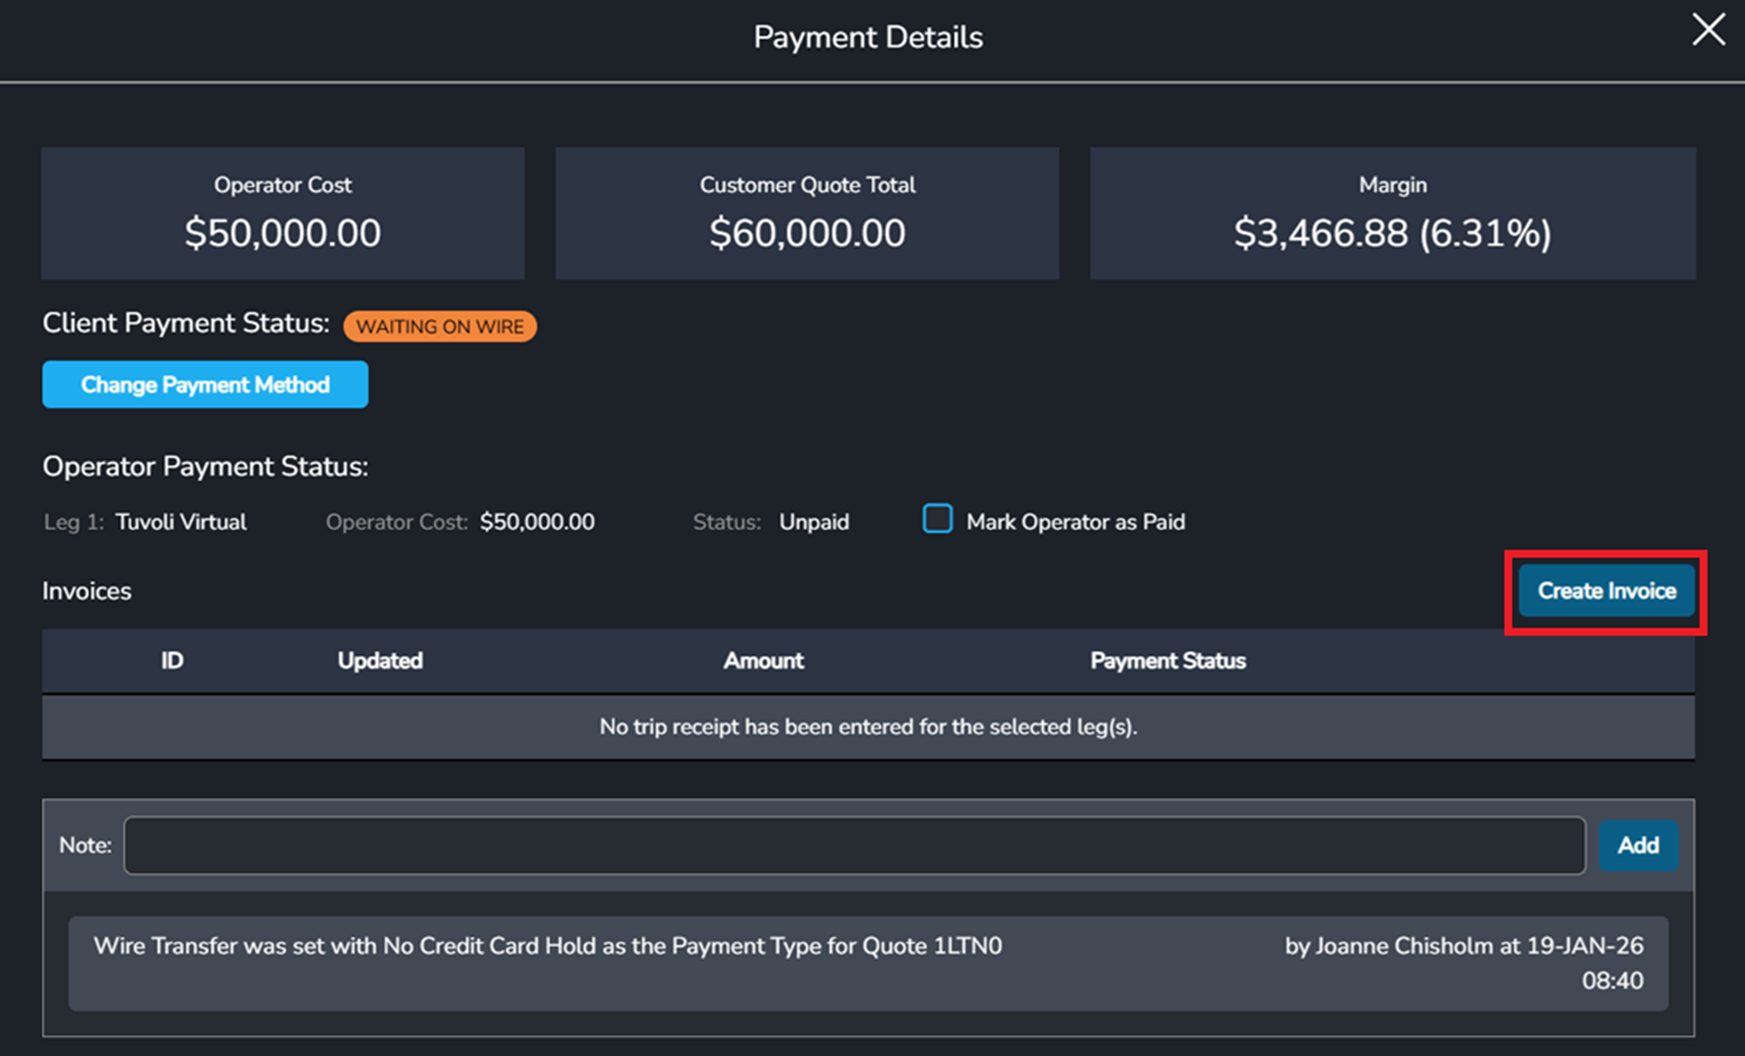
- Open the confirmed trip.
- Click Payment Details.
- Select Create Invoice.

Step 3: Review and Complete the Invoice
- The invoice will automatically pull in details from the confirmed quote, including:
- Itinerary
- Line items
- Taxes and fees
- You may add or remove items on the invoice as needed.
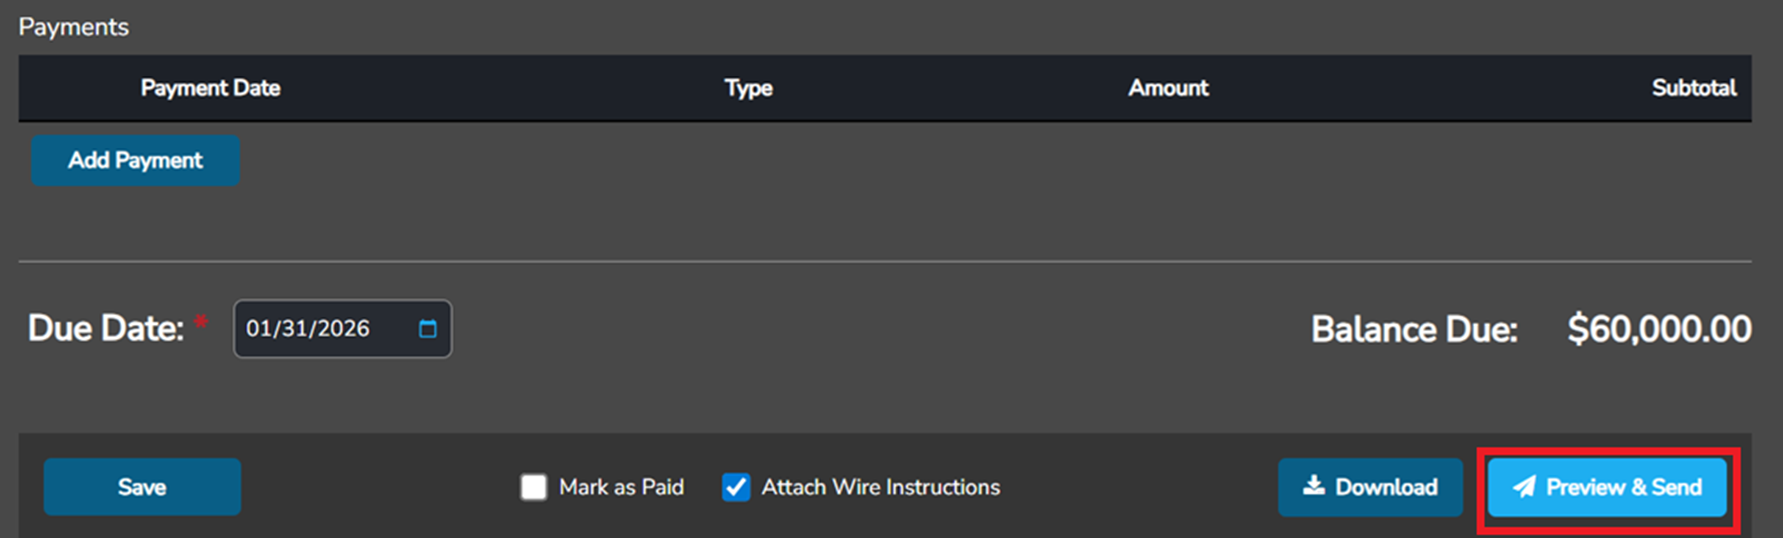
- Any fields marked with a red asterisk (*) are required.
- The invoice cannot be sent until all required fields are completed, including the Due Date.
Note: You can also attach wire instructions directly to the invoice.
Step 4: Send the Invoice
- Once the invoice is complete, you may:
- Download the invoice, and/or
- Select Preview and Send
- Selecting Preview and Send will open an email window—similar to sending a quote—allowing you to send the invoice directly to your client. Note: The email body must be populated, or the invoice will not send.
Step 5: Return to Trip Management
- After the invoice is sent, you will be returned to the invoice screen.
- Click Back to return to Trip Management.
Related to
60 KB