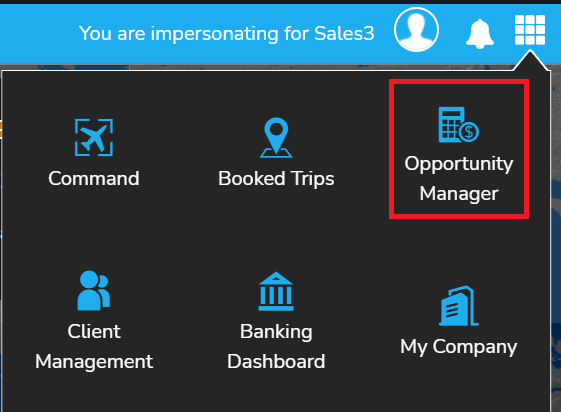
- Go to the waffle menu in the top right hand corner, click on "Opportunity Manager"
- Click "create opportunity" to start your quote. This will start the 5 step process to create a quote. This is Step 1.

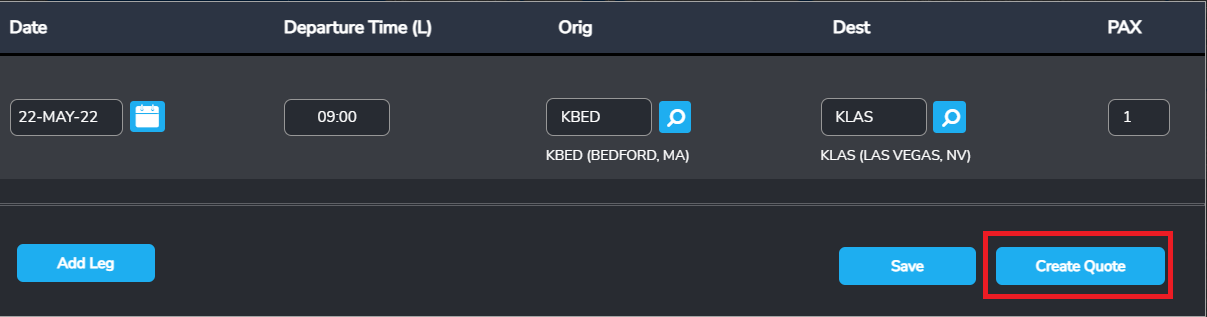
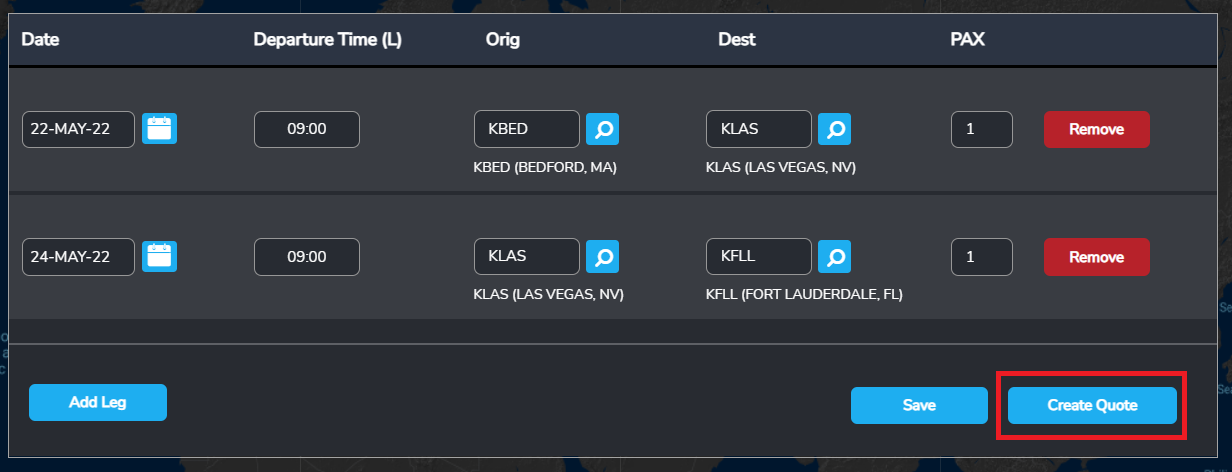
- Select the date of travel and leg information. Click "add leg" to add additional legs to the trip
- Click "Create Quote" to start your quote
-
- Example of trip with 1 leg
- Example of trip with 2 legs
- Example of trip with 1 leg
-
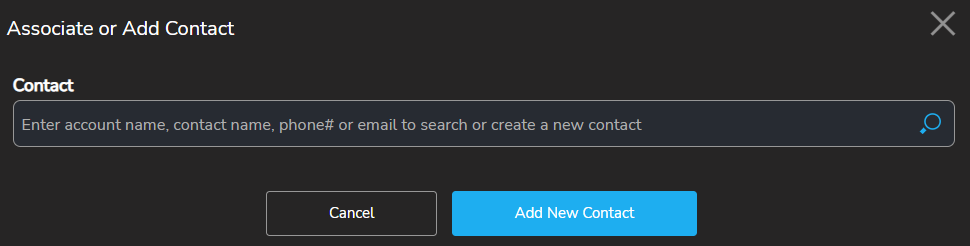
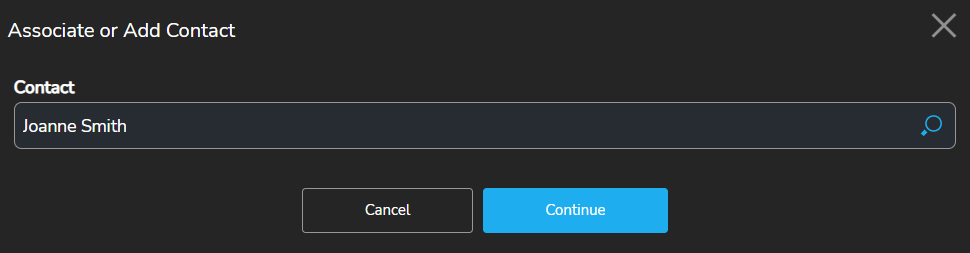
- Assign your quote a contact by clicking "Add contact". You can add a new contact or pull an already created contact from Client Management Client Management (where client contacts are stored)
-
- Once a contact has been assigned click "continue"
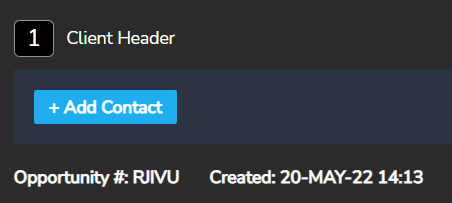
- The next page will display your contact information, Opportunity number, date of creation and Preparers notes. These are internal notes and will NOT display to the client (example- Passenger has two large dogs)

- Step 1, creating your Client Header is complete
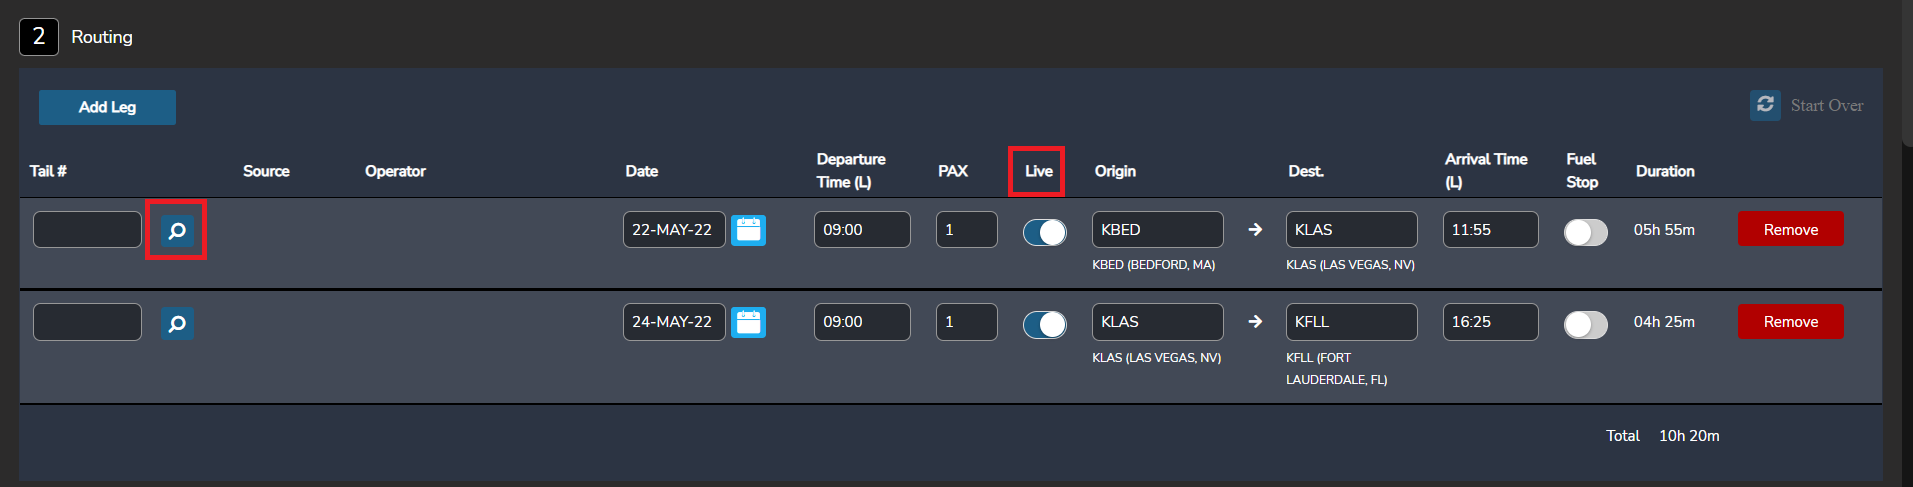
- Step 2, Routing. This step is where tails will be added and live vs repo legs identifed
- To select a tail, click on the magnifiying glass below "Tail #"
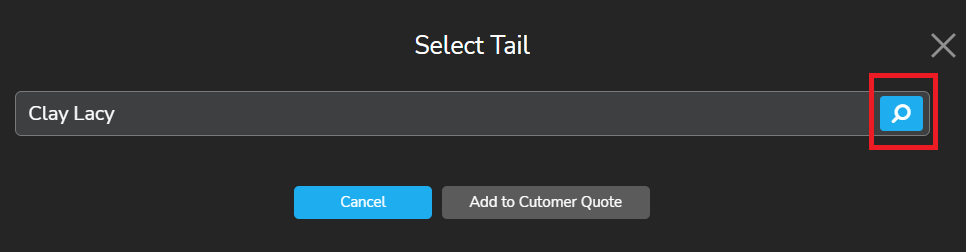
- You can select a tail by Operator, Tail # or Aircraft Type
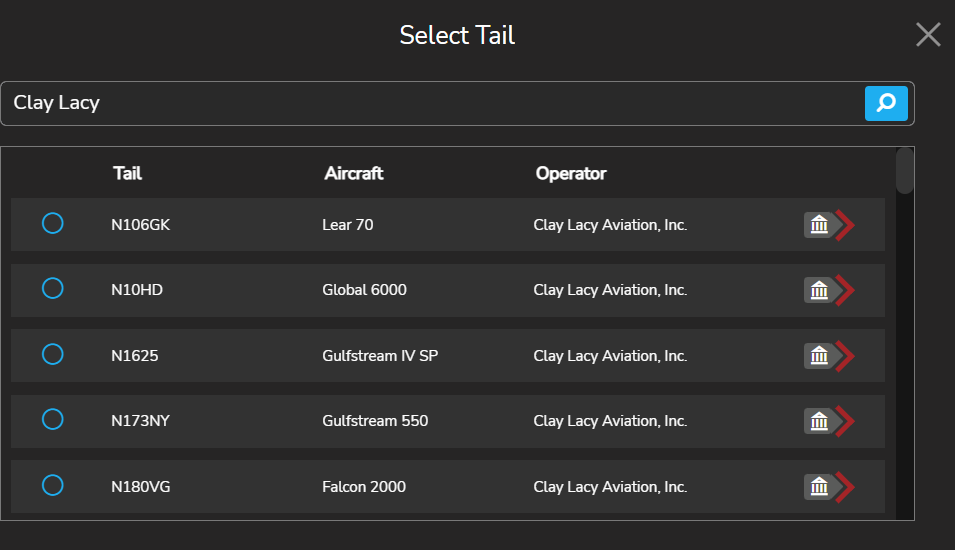
- To select by Operator or Tail#, type the Operator Name or Tail#
-

- Once you type the Operator Name or Tail # click on the maginfying glass to the right
-
- This will display all of the Operators tails or the specific tail#. This does not mean the selected tail is available. You'd have to verifiy with the operator before selecting. (FlyEasy Sourcing is not yet integrated but will be, the team is actively working on it)
-
 (When you see this symbol
 , it means you are able to pay the Operator through the Tuvoli platform.)
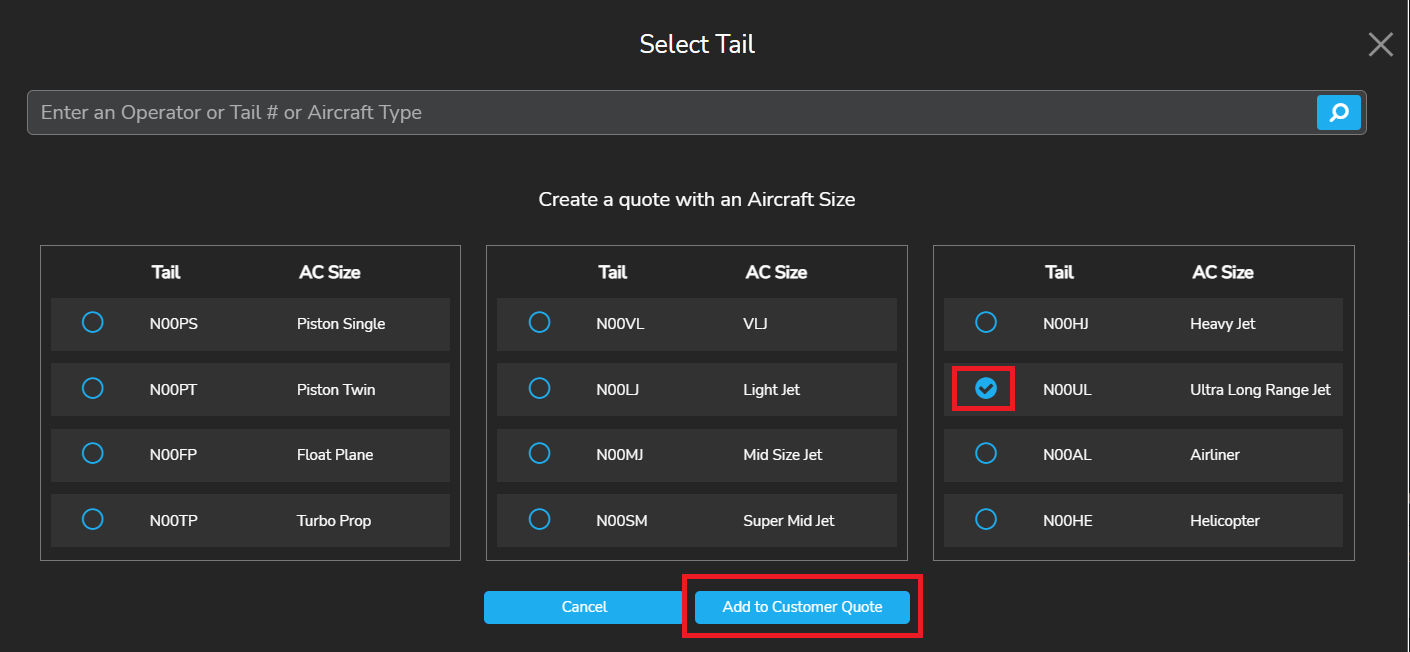
- To select by Aircraft Type simply click the raidio button to the left of desired aircraft and Click "Add to Customer Quote"
-
- Regardless of whether you add the tail by Operator, Tail # or Aircraft Type, once you have made the desired selection click "Add to Customer Quote"
- Different tails can be added for the different legs
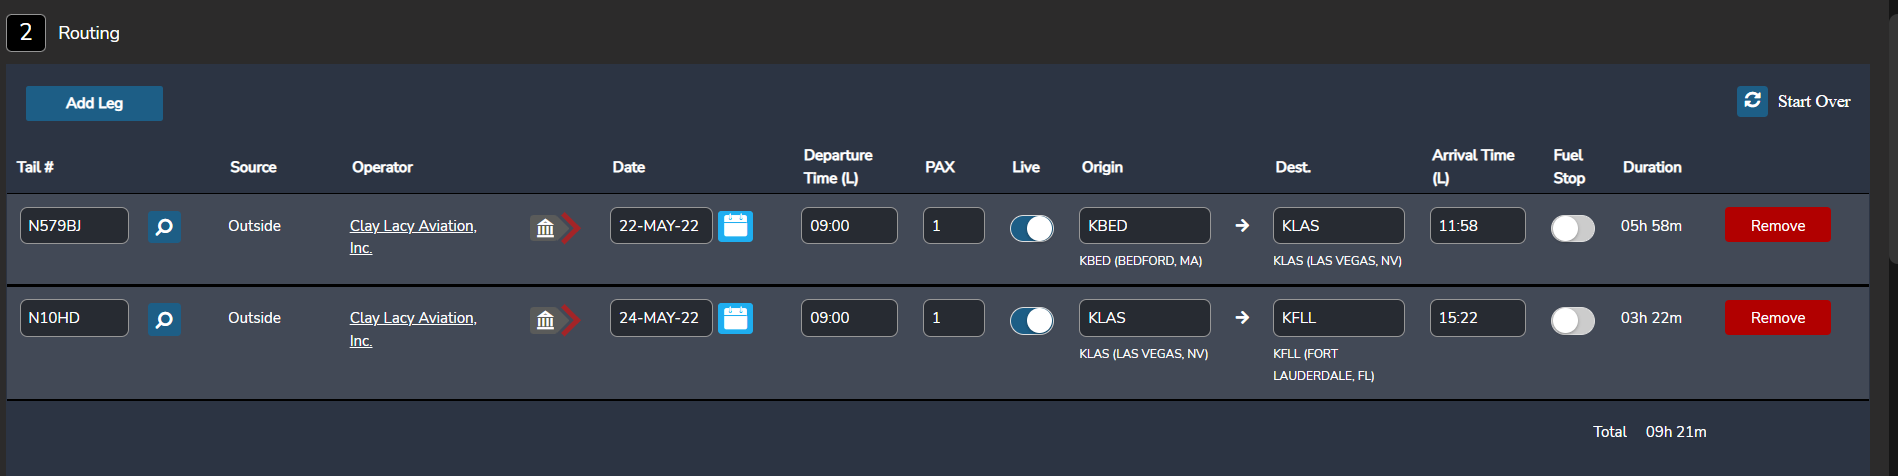
- Step 2, Routing is complete.
- Step 3, Aircraft information.
- In this section, you will be able to view the images that will be displayed to your client. Each tail has it's own tab. You can use the preselected operator images, stock images or upload your own images. You can also upload an offline quote,

- Step 3, Aircraft information is complete,
- Step 4, Quoting Calculator.
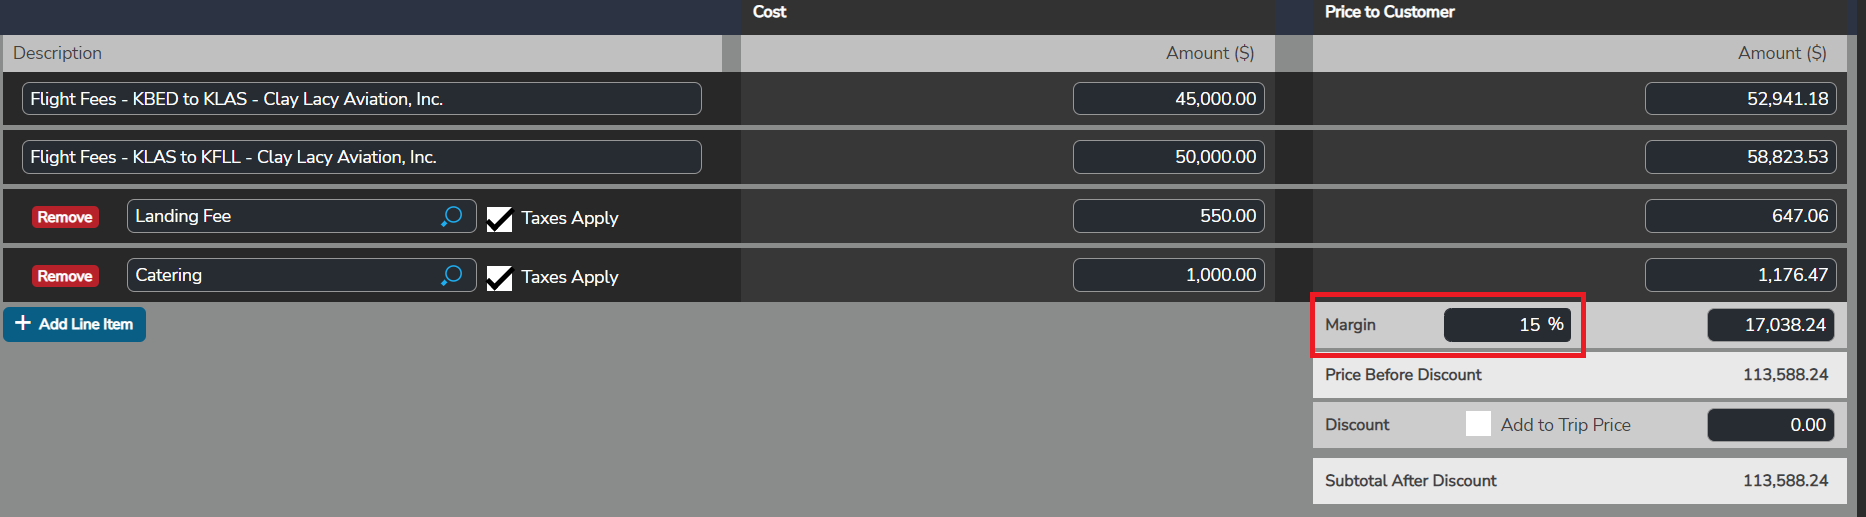
- In this section you will set up the pricing, fees, margin etc. to send to your client.
- Add leg costs in the cost section. The tool will automatically calculate applicable taxes and margin based on what you have selected in the calculator.

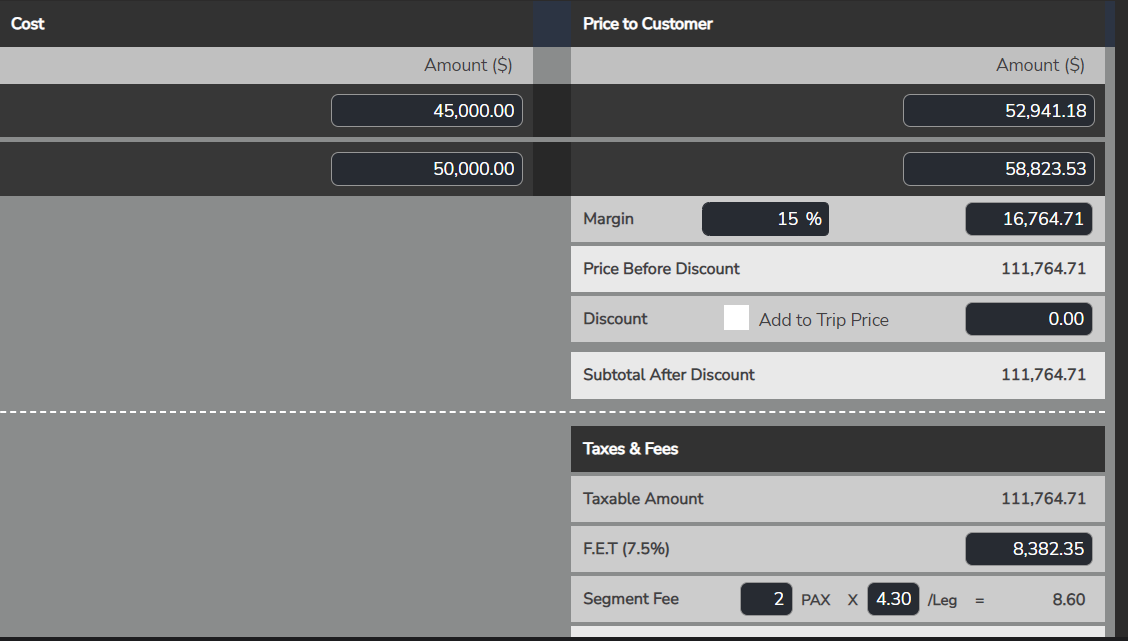
- To add fees to the quote i.e. landing or catering, simply click on "add line item". You can check or uncheck if you would like taxes to be applied to the fee. Again, the calculator will automatically update the pricing accordingly.

- The margin is prepopulated to a 15% mark up but can be changed to whatever amount you want it to be. If you change the margin or update any of the pricing, the calculator will automatically update and adjust all of the other amounts and totals.

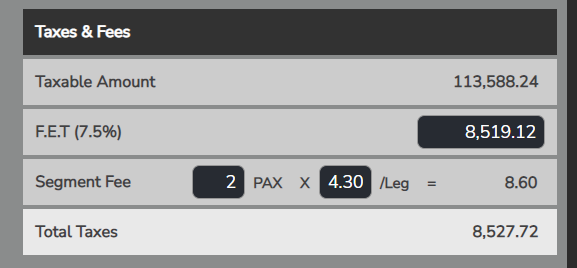
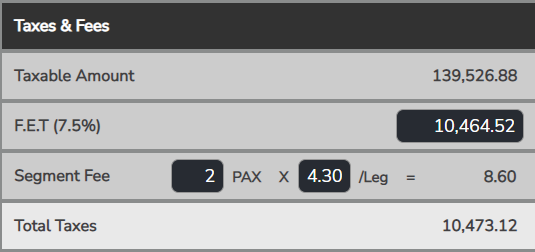
- Taxes and fees are automatically calculated for you based on the above pricing
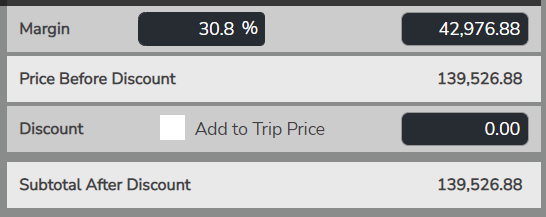
- All in pricing. You have the ability to select a flat all in pricing cost for the trip. Since I selected an all in pricing on this example, you can see margin and taxes/fees adjusted up to 30.8%

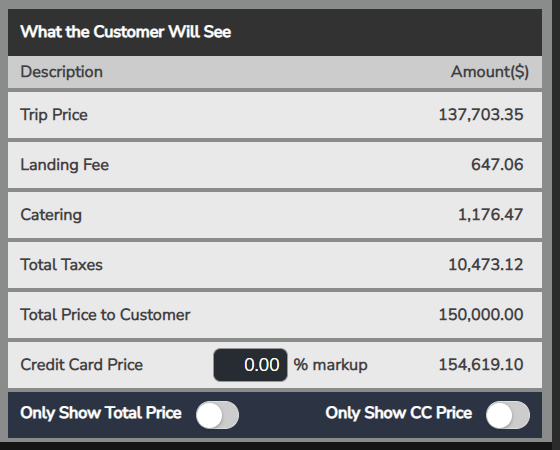
- What the customer will see. You can choose the view you want them to see on the quote- the total price or the credit card price.
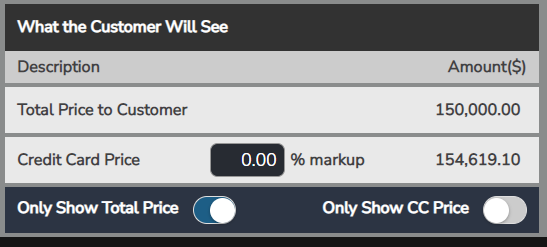
- View for show Total Price
- Once you are satisfied with the pricing displaying, Step 4 Pricing Calculator is complete.
- Step 5, See Additional Terms and Conditions (Clauses)
- Here is where you will add any important terms and conditions which have been previously created and added to your My Company Page, clauses, restrictions, operator information etc., into the quote. The receiver of the quote WILL receive everything in this field.
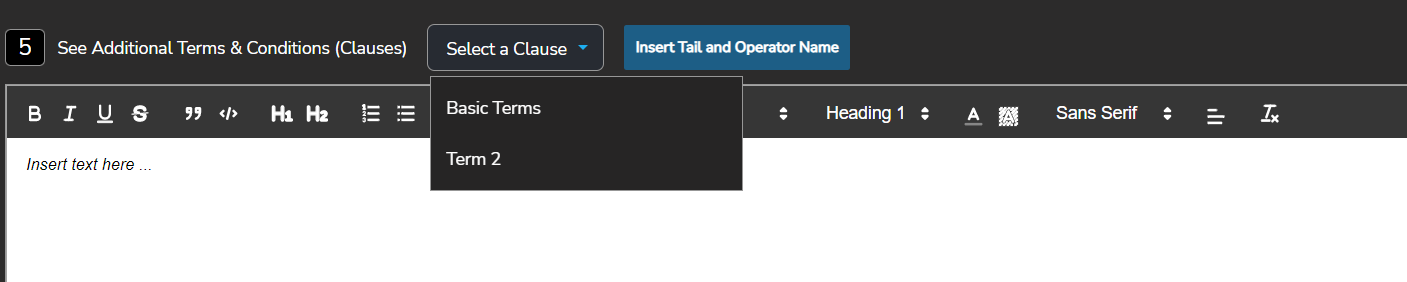
- In this example I have selected the "Terms 2" clause as well as inserted the Tail and Operator Name"

- Once you are satisfied with the clauses and information in the text box click "Save"

- Step 5 is complete.
- How do I send out my quote? Click the link below to bring you to the next article explaining the process on how to send out your client quote Opportunity Manager- Overview and how to send your client quote